Migrate your ESXI VMs to proxmox ZFS
 Lately, I migrated my personal lab from ESXI to proxmox hypervisor.
Many reasons are behind this move :
– using vmware esxi free did not allow me proper HA or replication
– each update was painful, and got some CPU no longer supported warnings
– not free open source etc.
– saw proxmox running at other place and was looking good
– the need to learn something new, and to have HA at my home lab as I migrated my workloads from VPS to home (due to OVH suspending an old offer and not allowing to migrate, but rather requiring full re install, in short delays…. tired of not controlling anything, I wanted to move my stack home, and have some redundancy).
Basically, this operation was from the following :
ESXI 6.7 latest update available in 2020 April (aside of the new major 7) to Proxmox PVE 6.1.8
This assume you have an ESXI and proxmox up and running that can reach each other and that you have NO SNAPSHOT on vmware esxi.
I also assume you have a ZFS volume mounted in your proxmox.
On the proxmox node (pve), from the shell, I install SSHFS :
#install SSHFS to mount esxi volumeapt install sshfs
#creating mount pointmkdir /mnt/ssh
#Mount root directory of esxi on /mnt/ssh of pve node
sshfs root@esxi:/ /mnt/ssh
#Convert flat VMDK drive to raw image (reading on esxi via SSHFS and output on your local proxmox)
#The below command must run from a drive where you have enough space to store the full size VMDK (usually /volume-you-created on your proxmox)qemu-img convert /mnt/ssh/vmfs/volumes/<yourdatastore>/<yourvmname>/<yourvmname>-flat.vmkd -O raw <yourvmname>.raw
#Create the target VM in proxmox with the same specs as ESXI, and making sure you pick ZFS volume as storage.
#identify target disk of the created VM in /dev/zvol/<volumeName>/<diskName>
#Once you know where is you new VM (usually a number associated with the VM) volume is you can dump the raw image to the new virtual diskdd bs=1M if=<yourVMname>.raw of=/dev/zvol/<volumeName>/<diskName>
If your machine is loaded, the command above may stale your ZFS and overload the server ( load can be way above amount of availalbe threads, due to default ZFS settings no limiting amount of threads).
A workaround found here actually helped getting around the issue using the option oflag=directdd bs=1M oflag=direct if=<yourVMname>.raw of=/dev/zvol/<volumeName>/<diskName>
Hope this helps, when migrating big VMDKs over 1TB, I had ZFS crashes due to this, command above allows to import them properly.
#When done, start the new VM and see if it boots. The main issue I had either on CentOs or Debian, was that network interface name changed. So at first boot, VM has no network.
#Not a big issue, edit the interface name in /etc/network/interface (debian) or /etc/sysconfig/network-scripts/ifcfg-ethx (CentOs)
#The MAC address changed, unless you forced it while creating the VM.
#As soon as your VM is up, delete the .raw image from your drive to free up space.
This is how I migrated 8 VMs, from ESXI to Proxmox without any issues.
Additional notes following this migration (2020 April 27) :
After migrating my last VM, I had a weird error stating I did not have enough space to replicate, as the system could not take any snapshot.
This is due to a default setting in ZFS, in Proxmox, where by default, a space reservation on the volume is made for snapshots etc, with the same size of the actual disk size.
While fine for most of the case, when you have a VM with 1.66TB drive, it starts to be an issue.
There is more explanation here about ZFS refreservation : http://www.mceith.com/blog/?p=153
Basically, in my case, the refreservation was as big at 1.66TB, not allowing snapshots to be taken, and therefore, not allowing VM replication.
You can see the information for a volume with the following command :
zfs get refquota,reservation,refreservation yourvolume/your-vm-disk
So basically, for my VM that had a refreservation default value of 1.66TB, I actually did set it to 500G, since my drive only had 578G of unassigned space.
This allowed the replication process to go on :
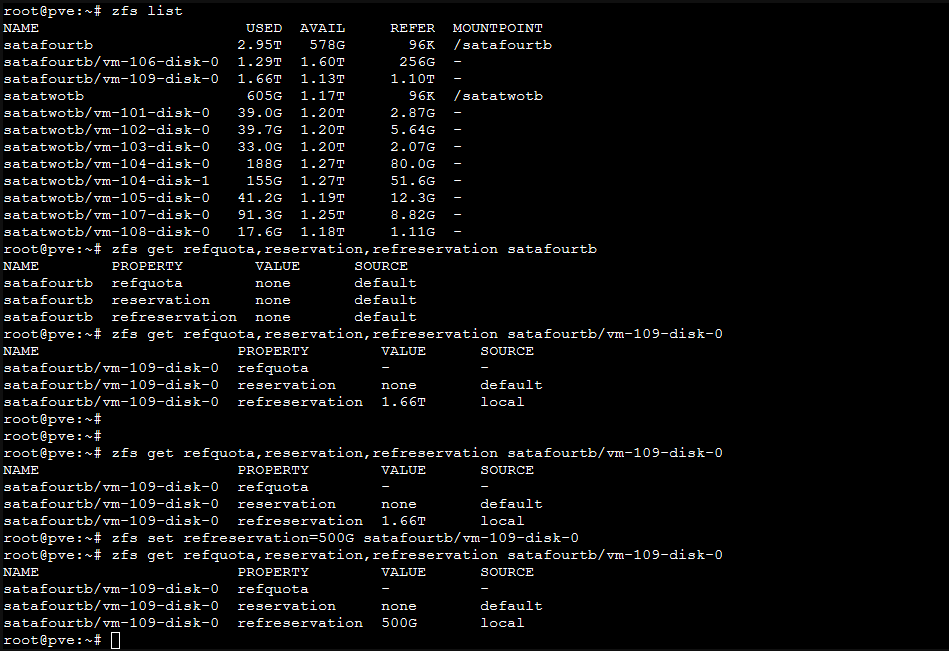
Hopefully this will help some, facing the disk full issue where disk is not actually full but reserved.
![]()
Install your VPN server with pi-hole on OVH VPS in 30 min
Prereqs : You must have an SSH client (native Linux SSH command, or putty on windows… poor you), you must know how to edit a file in command line (using vim or nano, as you like), you must know how to use terminal menu (tab to switch options, space to select, enter to validate)
Port : This tutorial expect to run Openvpn on port 443 (SSL port), if you want to use another one, just replace 443 by the port you wish in the whole tutorial below.
Note : This is done using an OVH VPS, with Debian 9, other cloud VPS might differ if not default debian 9.
Note2 : This will allow all devices on VPN to communicate with each other (client to client options enabled by default, and firewall rules allows this as well) – If you want to block client to client communication, check this pagehttps://blog.inforeseau.com/openvpn-and-pihole-on-ovh-vps-server-faq
Order OVH VPS with latest Debian (VPS SSD, cheapest at CAD $4.49/month ! )
SSH to it. (credentials for SSH root in the email you receive after OS installation)
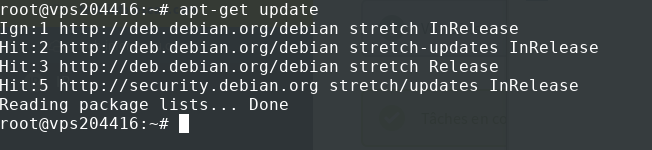
Update and Install tools we want (editors, firewall, auto updates) :
apt-get update
apt upgrade
apt install aptitude iptables-persistent vim curl unattended-upgrades
It should look like this :
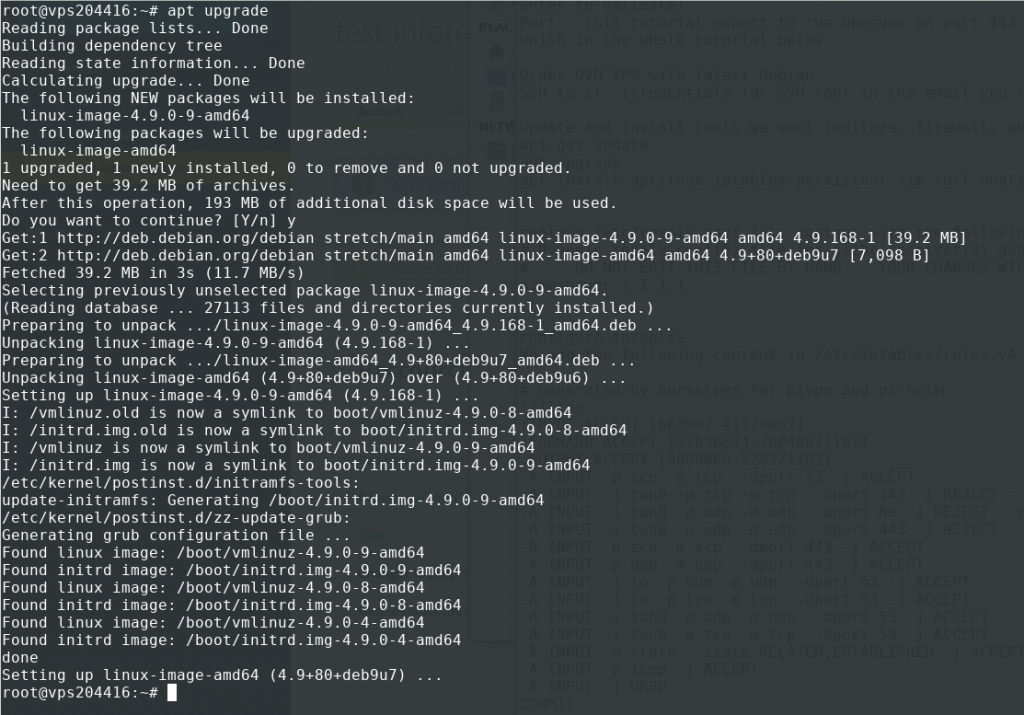
(YES to save current IPv4 rules and YES to save current IPv6 fules when install iptables)
Replace /etc/resolv.conf file content with the following
#Dynamic resolv.conf(5) file for glibc resolver(3) generated by resolvconf(8)
#DO NOT EDIT THIS FILE BY HAND -- YOUR CHANGES WILL BE OVERWRITTEN
nameserver 9.9.9.9
Configure iptables
We add the following content in /etc/iptables/rules.v4 (replace all the content using vim or another tool or remotely with filezilla)
#Generated by ourselves for pivpn and pi-hole
 *filter
 :INPUT ACCEPT [663907:41179802]
 :FORWARD ACCEPT [57036644:76048011107]
 :OUTPUT ACCEPT [5009068:528571183]
 -A INPUT -p tcp -m tcp --dport 22 -j ACCEPT
#Don t change the port 443 in the 3 lines below, this is for pihole performance
 -A INPUT -i tun0 -p tcp -m tcp --dport 443 -j REJECT --reject-with tcp-reset
 -A INPUT -i tun0 -p udp -m udp --dport 80 -j REJECT --reject-with icmp-port-unreachable
 -A INPUT -i tun0 -p udp -m udp --dport 443 -j REJECT --reject-with icmp-port-unreachable
#End of don t change these
#Port allowed for VPN, change if you decide to use another port for your VPN server (replace 443 below by whatever you chose)
 -A INPUT -p tcp -m tcp --dport 443 -j ACCEPT
 -A INPUT -p udp -m udp --dport 443 -j ACCEPT
#End of port to change if you get your VPN server to run on another port
 -A INPUT -i lo -p udp -m udp --dport 53 -j ACCEPT
 -A INPUT -i lo -p tcp -m tcp --dport 53 -j ACCEPT
 -A INPUT -i tun0 -p udp -m udp --dport 53 -j ACCEPT
 -A INPUT -i tun0 -p tcp -m tcp --dport 53 -j ACCEPT
 -A INPUT -m state --state RELATED,ESTABLISHED -j ACCEPT
 -A INPUT -p icmp -j ACCEPT
 -A INPUT -j DROP
 COMMIT
 #Completed on Sat Apr 27 16:18:39 2019
 #Generated by iptables-save v1.6.0 on Sat Apr 27 16:18:39 2019
 *nat
 :PREROUTING ACCEPT [496992:46323248]
 :INPUT ACCEPT [335723:24234770]
 :OUTPUT ACCEPT [486171:32444728]
 :POSTROUTING ACCEPT [491702:32816107]
 #if you need to use 1 or more other port(s), just add as many line as below, whitout the # so it is actually loaded, ens3 is the NIC of the VPS, adjust if yours differ
 #Below will allow to connect to port 8080 aside of 443.
 #- A PREROUTING -i ens3 -p udp -m udp --dport 8080 -j REDIRECT --to-port 443
 COMMIT
 #Completed certainly after 2019 Apr 27t
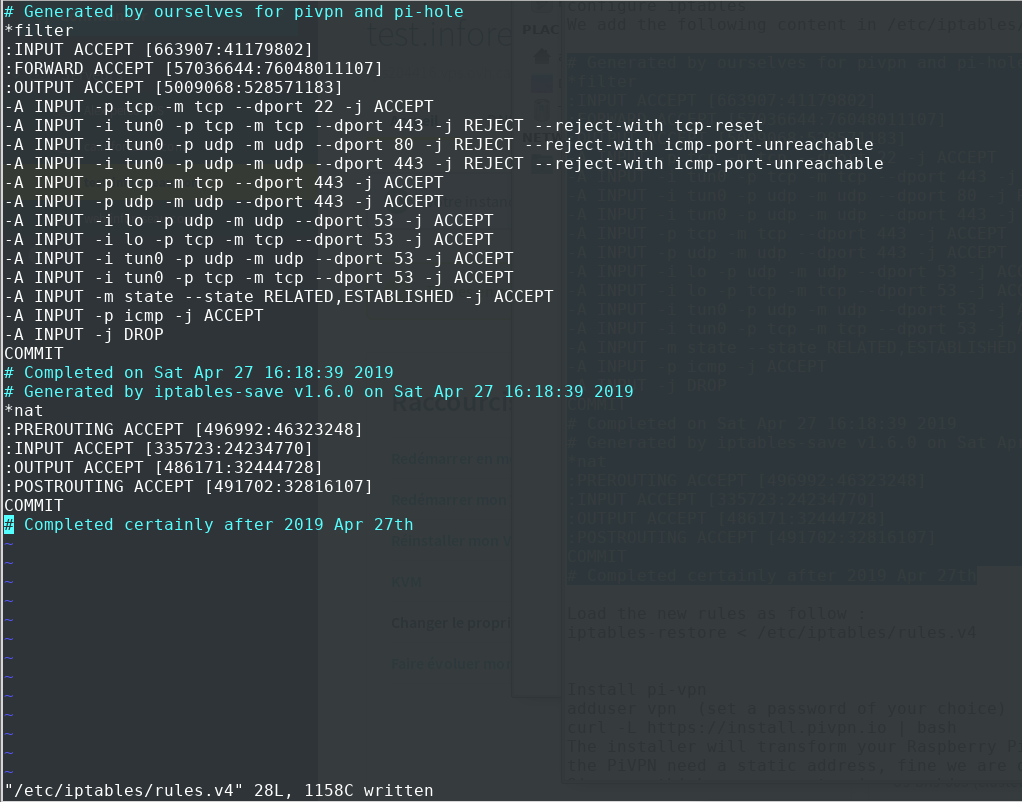
Load the new rules as follow :
iptables-restore < /etc/iptables/rules.v4
Install pi-vpn
adduser vpn (set a password of your choice)
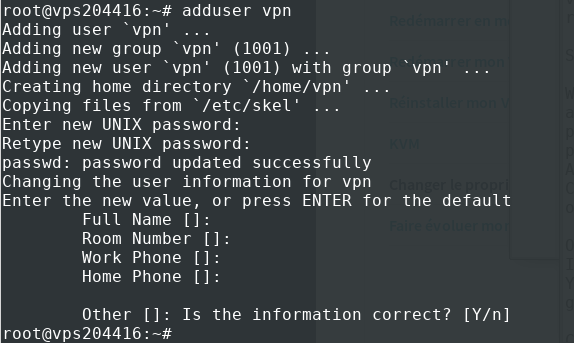
curl -L https://install.pivpn.io | bash
(if you have a name resolution issue, type the command again until it moves on)
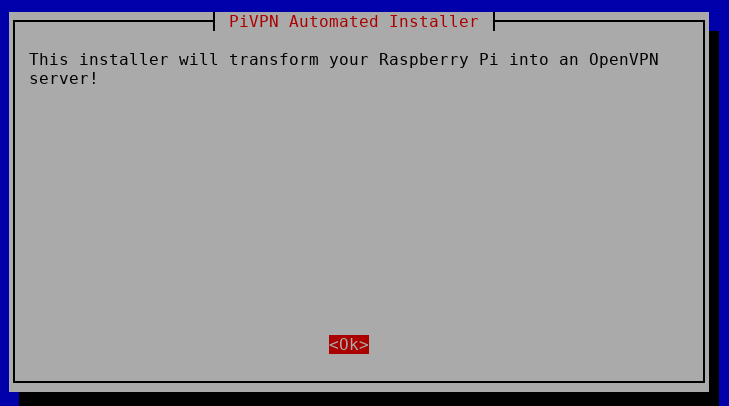
The installer will transform your Raspberry Pi into an openvpn server (will do for your debian VPS too :P ) OK
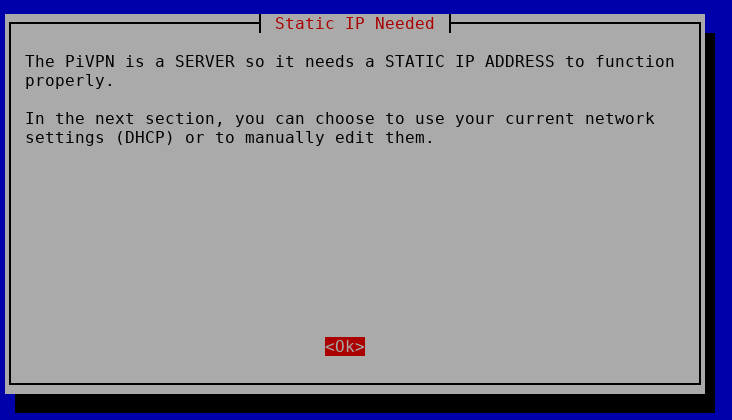
the PiVPN need a static address, fine we are on VPS with assigned IP, OK
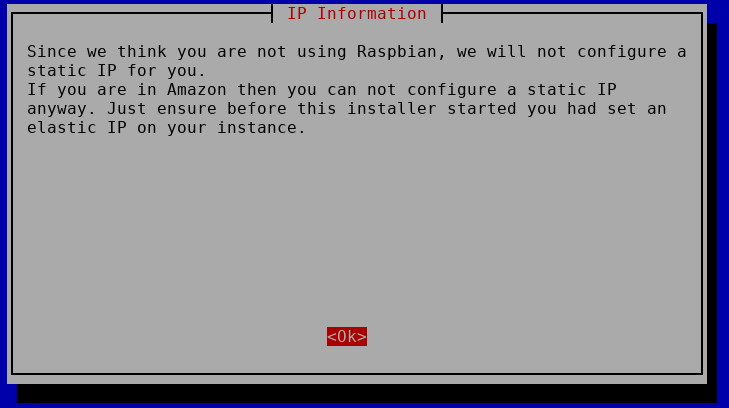
Since we think you are not using raspbian… correct, fine, OK
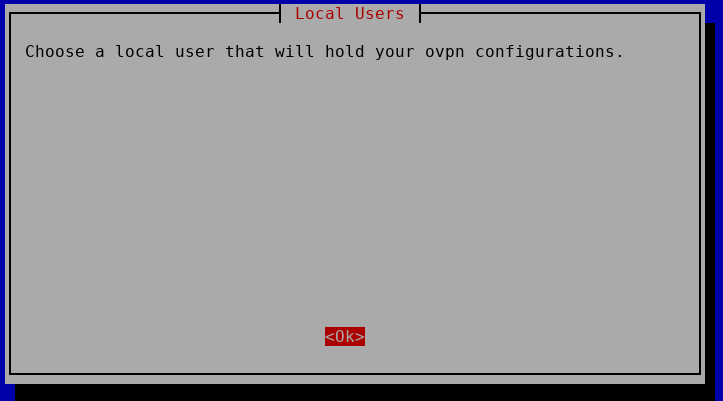
Choose user OK, select « vpn » that we just created and OK

It is recommended that you enable « unattended upgrade », OK, we already did this at the beginning

Do you want to enable unattended upgrades of security : NO (it is already done, no need to redo)

We want to use UDP protocol, Select UDP and OK

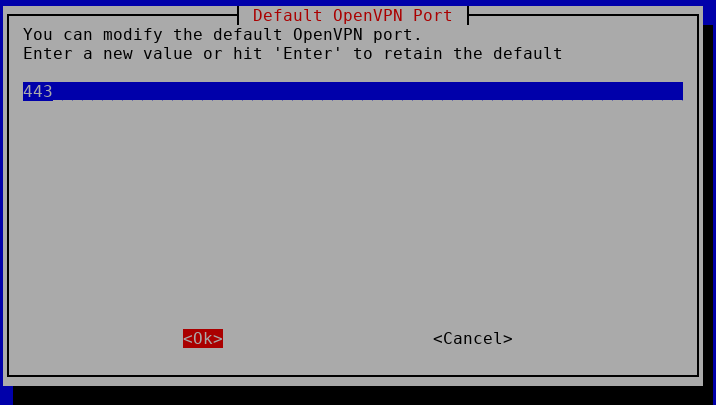
We modify the port to 443 as this will most likely will be allowed on most networks and OK
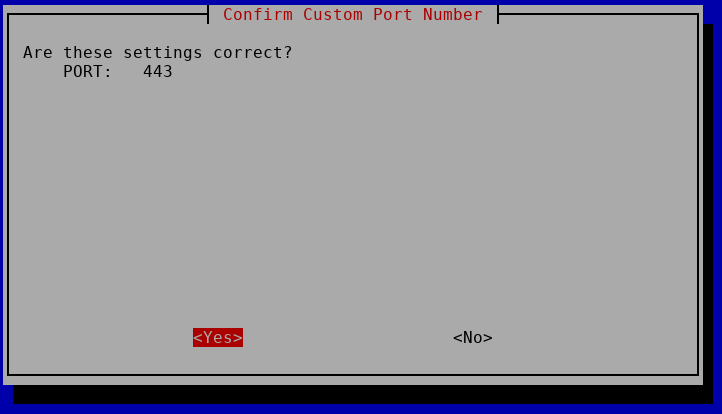
Are these settings correct : YES
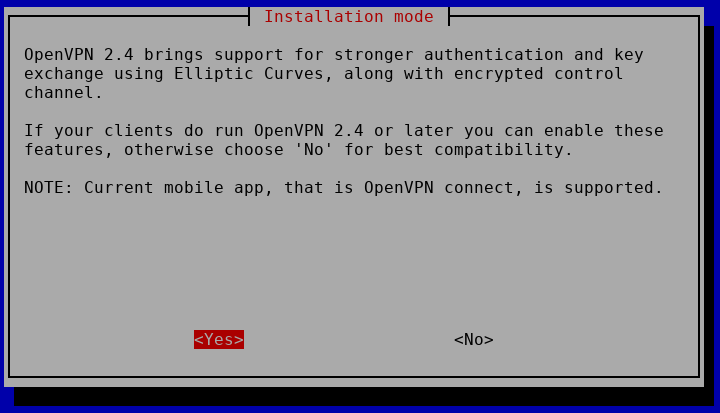
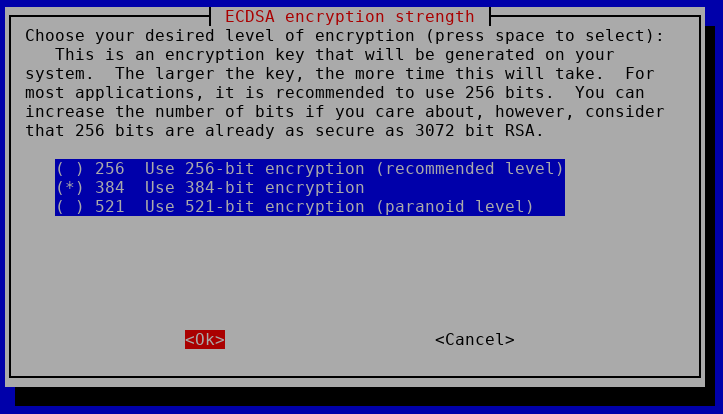
YES to the next screen about Elliptic curves for key exchanges
Next, i’d recommend at least 384-bit encryption, safer, not crazy overhead. OK
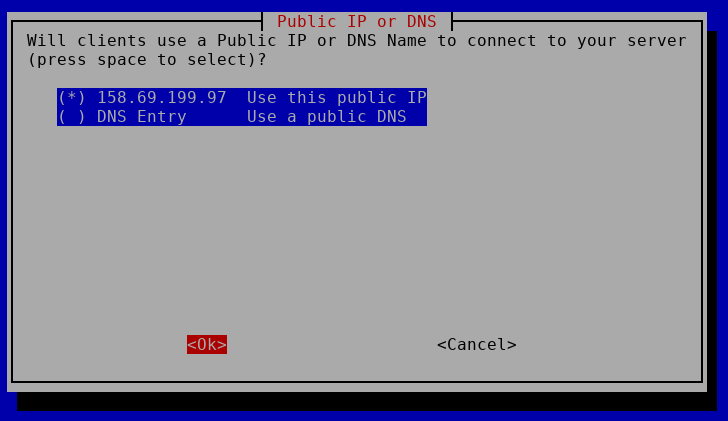
Client can use the public IP, OK, this is totally fine as VPS has static IP (DNS is more useful in case of dynamic DNS use) – It should be the IP of YOUR VPS
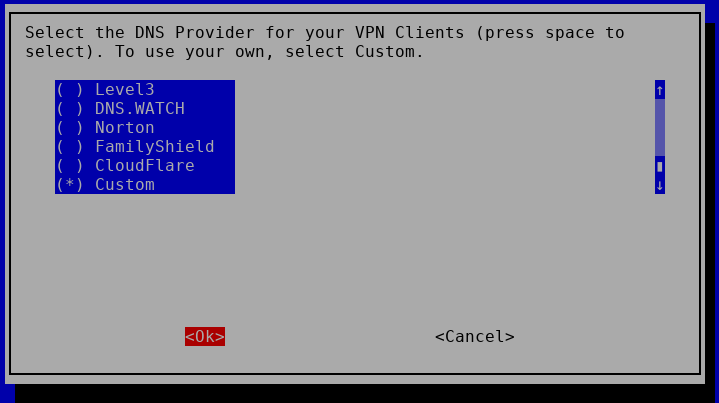
Select DNS provider, this is a key point, we want the benefit of pi-hole on our VPN, so we’ll go down the list, and select « Custom » (go down with arrows on keyboard to select custom), then OK
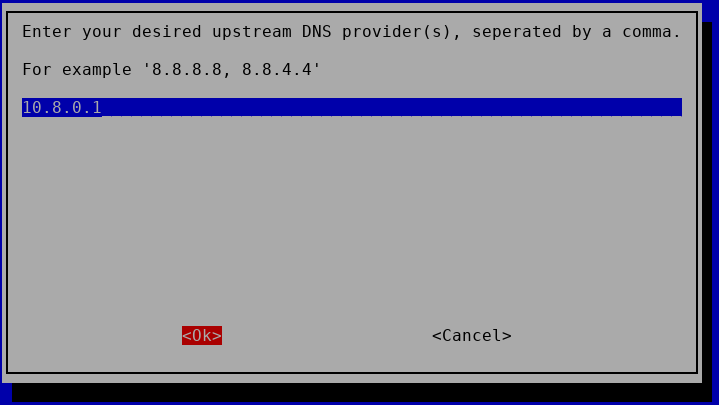
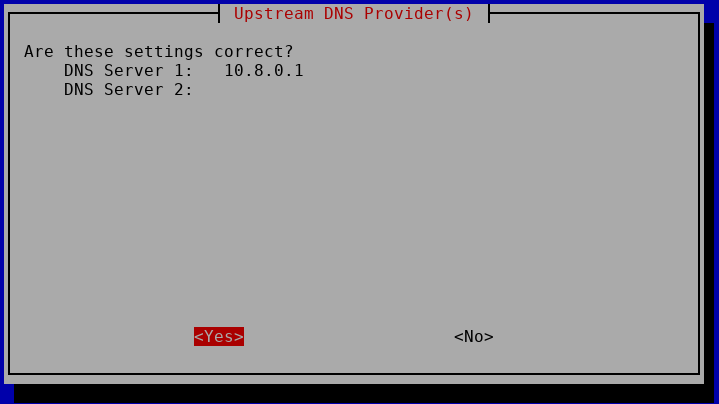
Fill the info with 10.8.0.1 and OK (this will be the IP of the openvpn server on tap0 that we allowed in firewall)
Are these settings ok ? YES
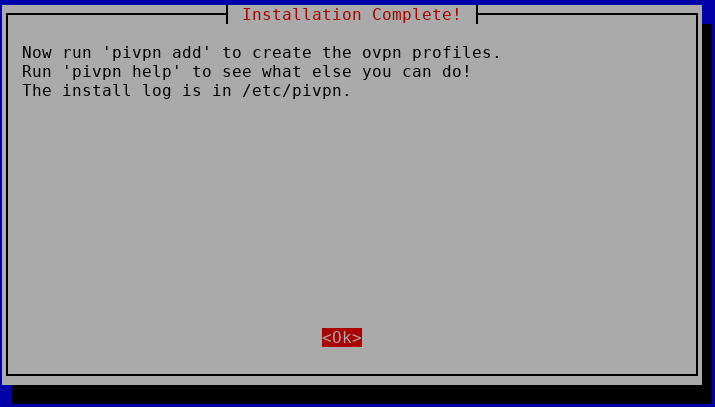
validate the end of installation OK
reboot the VPS – YES and confirm OK


After reboot, SSH again on it
We’ll generate a client certifacte
as root :
pivpn -a
provide a client name (like device name such as myphone1) and a password.
As shown, the client ovpn file will be placed in /home/vpn/ovpns/ (since we use the user « vpn » to handle VPN).
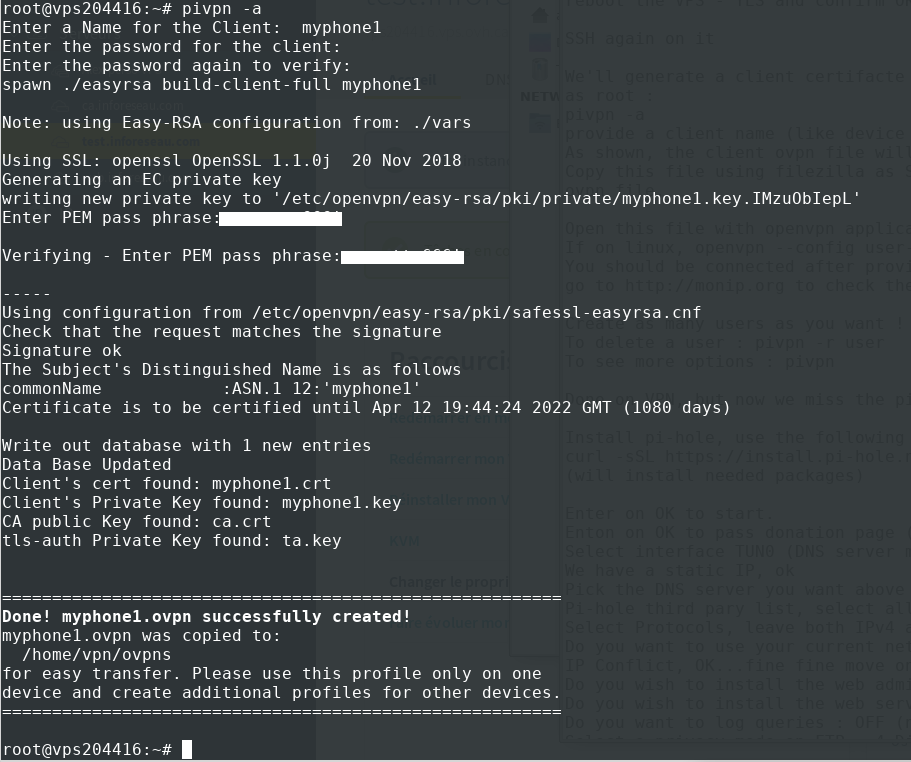
Copy this file using filezilla via SFTP(SSH) or cat on ovpn (cat /home/vpn/ovpns/user-you-chose.ovpn) and copy the content to a local ovpn file.
Open this file with openvpn application on your phone and connect :D
If on linux,
openvpn --config user-you-chose.ovpn
and it will connect.
You should be connected after providing the chosen password used when creating VPN user, and surf internet (when pi-hole below is installed too :P ) from your VPS with pi-hole filtering enabled !
go to http://monip.org to check the IP seen by websites (it should be the IP of your VPS).
Create as many users as you want ! Yes it’s free !
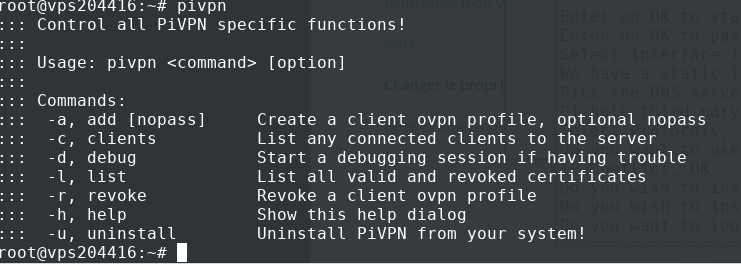
To delete a user : pivpn -r user
To see more options : pivpn
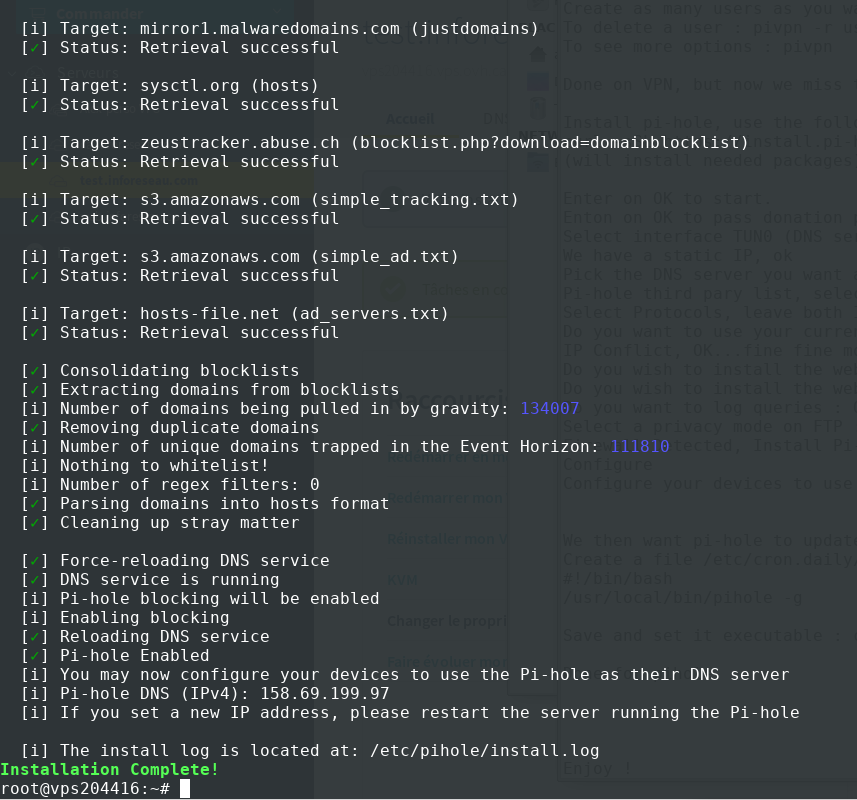
Done on VPN, but now we miss the pi-hole DNS filtering service, here we go (otherwise DNS resolution and filtering won’t work)
Install pi-hole, use the following command :
curl -sSL https://install.pi-hole.net | bash
(will install needed packages)
Enter on OK to start.

Enter on OK to pass donation page (donate if you want to support pihole project, it is amazing)
Select interface TUN0 (DNS server must listen on VPN interface)
We have a static IP, ok

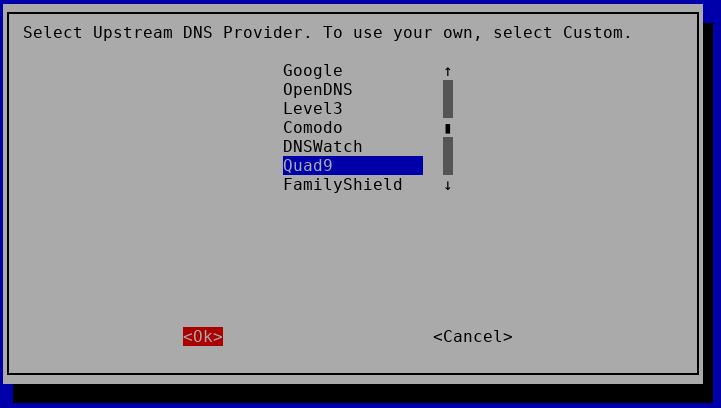
Pick the DNS server you want above pihole (i pick Quad9, but anything is good as you like) and press ok
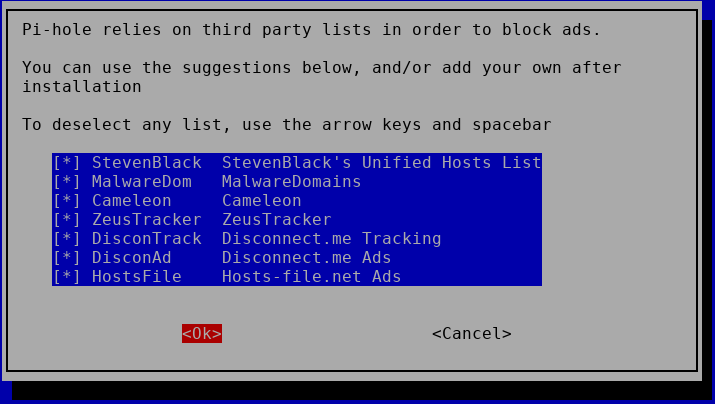
Pi-hole third party list, select all and press OK
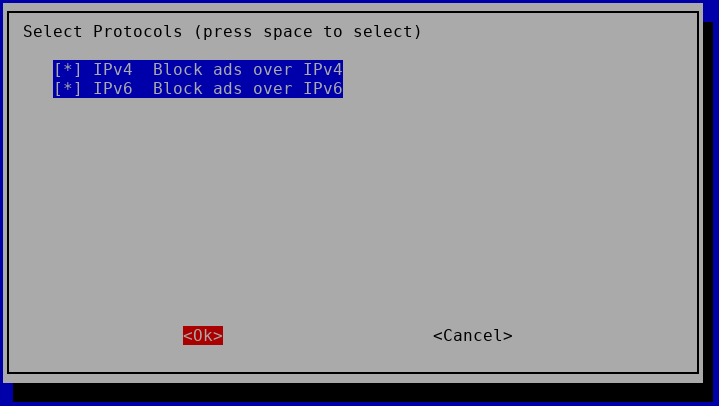
Select Protocols, leave both IPv4 and IPv6 checked, OK
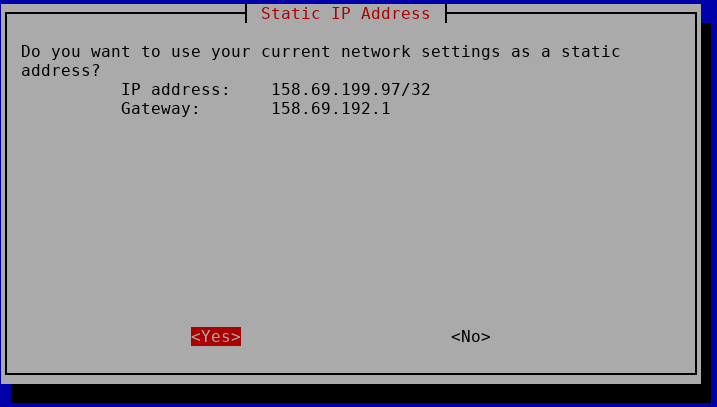
Do you want to use your current network settings, YES ! ( This should show the IP of YOUR VPS)
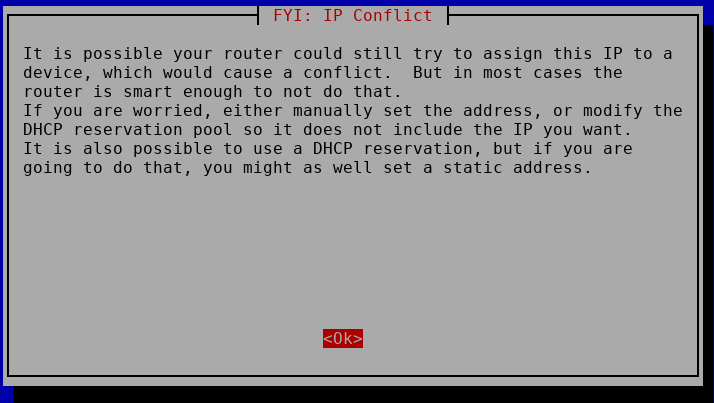
IP Conflict, OK…fine fine move on :P
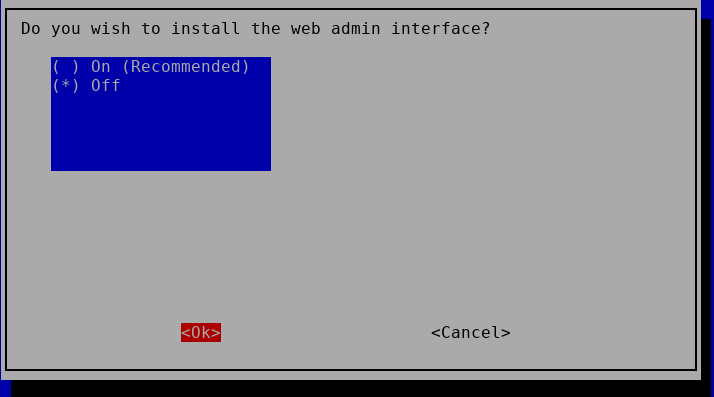
Do you wish to install the web admin interface : OFF and OK (we don’t need it, we won’t connect to it, won’t open it)
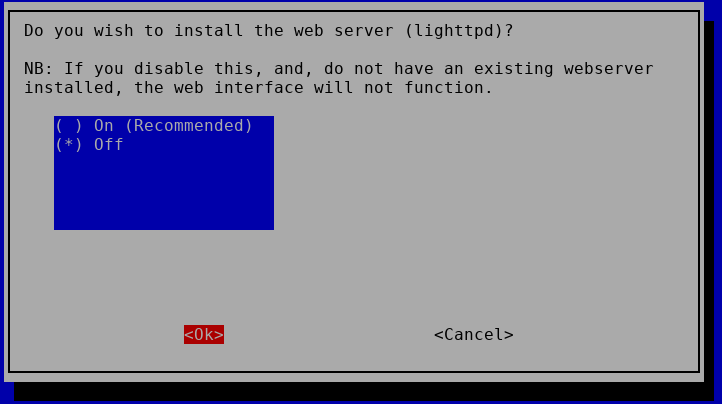
Do you wish to install the web server (lighttpd) ? OFF and OK (not needed)
Do you want to log queries : OFF (no we don’t want to leave tracks…)

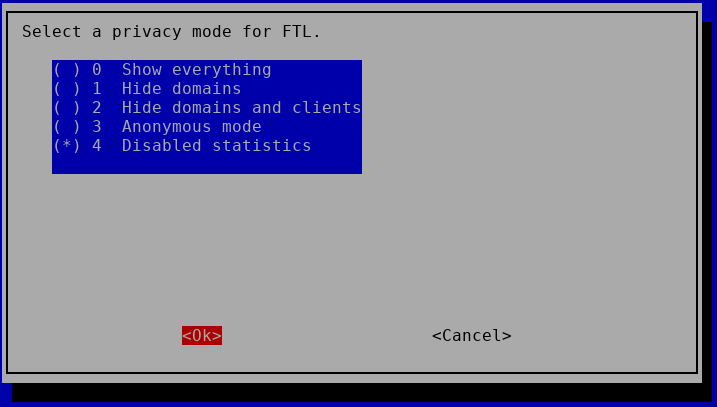
Select a privacy mode on FTP : 4 Disabled statistics (we are all about privacy here)
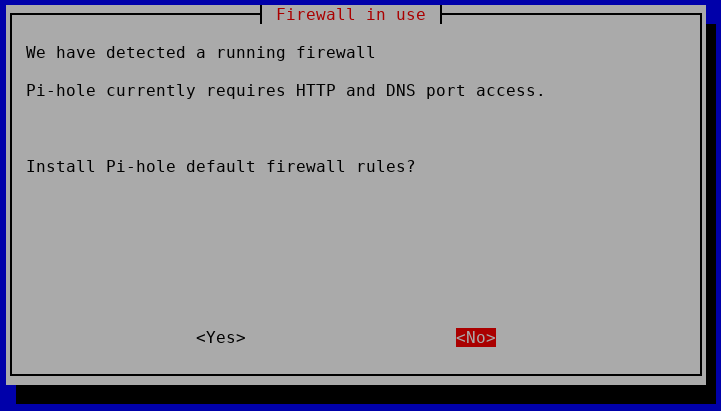
Firewall Detected, Install Pi-hole default firewall rules? NO, they are already in the iptables rules we copied
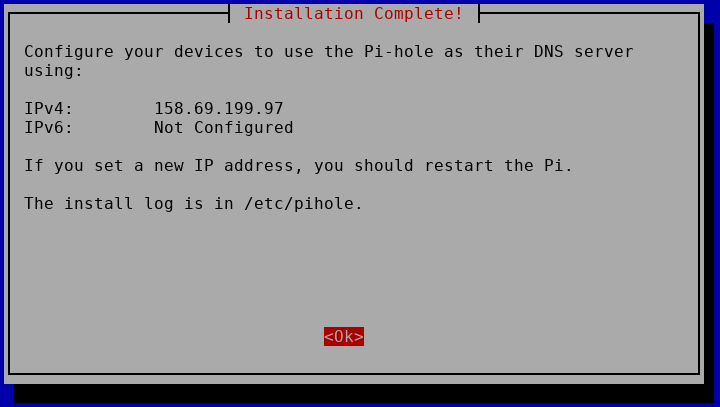
Configure your devices to use the pi-hole…. OK, we’ll do this in VPN config after.
We then want pi-hole to update its blacklist automatically everyday.
Create the file /etc/cron.daily/piholeupdate with the following content :
#!/bin/bash
/usr/local/bin/pihole -g
Save and make it executable :
chmod +x /etc/cron.daily/piholeupdate
Done for pihole.
Enjoy !
Use the command « pivpn » to generate as many users as devices you have, install openvpn client on it (android, iOS, linux or windows or tunnelblick on MAC), and import the .ovpn file that you generated using the password you entered when creating user.
If one of your device is stolen or lost, revoke the certificate.
You can now browse internet, seen as your VPS, and no one can snoop on your traffic, without adds, without tracking :P (still take a canvas randomizer plugin for your browser to avoid device signature).
Security note : By default the OVH VPS is installed with a ROOT account and a password provided to you. Online servers are under attack on a permanent basis.
I recommend that you log on your VPS with an SSH private/public key instead of the password.
To do this, you need to generate a private/public key on your client machine (on linux, usually located in /home/your_user/.ssh/id_rsa.pub). If you have one, you can use it otherwise, generate one with the command « ssh-keygen -t rsa », then you copy the content of your local file id_rsa.pub to your VPS in the file /root/.ssh/authorized_keys)
Then try to ssh to the machine, ssh root@your_server, accepting he signature, you should be logged in without password
Now that we can SSH without password, we’ll disable the password authentication in SSH server. Edit the file /etc/ssh/sshd_config, and add the following line (if not already set) :
PasswordAuthentication no
Save and quit, restart the sshd server : service sshd restart
From this point, you can no longer login with a password, only the SSH key is accepted.
No more dictionary attack or password guessing. If ever you lose your local machine/private key, you can always go in the OVH console,through web management interface, and open the vKVM, to connect on the machine through the console with the root password. Enjoy.
![]()
Using raspberry pi 3 as wifi bridge and repeater and firewall
Hi again,
following my raspberry 3 router project (https://blog.inforeseau.com/2018/06/raspberry-3-point-dacces-wifi-avec-filtrage-pub-tracking-access-point-add-tracking-filtering) and the repeater project (https://blog.inforeseau.com/2019/01/raspberry-3-create-a-wifi-repeater-with-usb-wifi-dongle) , i decided to fork these into a wifi repeater and bridge.
The goal is to use this approach in hotels or public wifi, where you wish to use your own router with its pi-hole and firewall. Any device connected behind the raspberry, will be hidden behind a totally blocking firewall.
So, let’s make it simple, i assume you took the image of the router project : https://blog.inforeseau.com/2018/06/raspberry-3-point-dacces-wifi-avec-filtrage-pub-tracking-access-point-add-tracking-filtering
I also assume you have the needed hardware ( a raspberry 3 and a wifi adapter like the canakit or panda as recommended into the linked original post)
You then replace the file /etc/rc.local (available as zip file here rc.local ) in the SD CARD rootfs partition, by the following one, in which you customize the following values :
wifissid which is your access point name, the SSID on which you will connect
wifipass which is the password you’ll have to use to this access point
existingwifissid which is the existing wifi on which the raspberry will connect to (the hotel or public wifi SSID)
existingwifipass which is the existing password of the wifi on which the raspberry will connect to (the hotel or public wifi password)
[bash]#!/bin/sh
# removed -e option above, because below command returns some warnings that must be ignored
# rc.local
#
# This script is executed at the end of each multiuser runlevel.
# Make sure that the script will "exit 0" on success or any other
# value on error.
#
# In order to enable or disable this script just change the execution
# bits.
#
# By default this script does nothing.
# Print the IP address
_IP=$(hostname -I) || true
if [ "$_IP" ]; then
printf "My IP address is %s\n" "$_IP"
fi
# Create Access point wifi raspap other USB adapter
#/usr/bin/create_ap --isolate-clients --daemon --ieee80211n --ht_capab '[HT40+]' -c 44 -w 2 wlxe84e0651e6f6 enxb827eb9446d8 raspappriv welcomepriv2
#in this version, we connect to wan through wifi, so the onboard ethernet will be another LAN
onboardlan=`/root/get-nic.sh`
#since we'll connect to an existing wifi
#if using panda wifi, device is called wlan1, if using canakit, device is called wlx......
#we need to know if we have a wlan1
iswlan1=`/sbin/ifconfig -a|/bin/grep wlan1`;
#defining USB wifi interface name
if [ ! -z "${iswlan1}" ]; then
onboardwan="wlan1"
else
#we need to extract it
onboardwan=`/sbin/ifconfig -a|/bin/grep wlx|/usr/bin/awk -F ":" '{print $1}'`;
fi
#using the canakit wifi, only 2.4Ghz is supported, check before entering SSID in here
existingwifissid="my-wifi-ssid"
existingwifipass="my-wifi-password"
#we make sure default wpa-supplicant is empty
/bin/echo "" &amp;amp;amp;amp;amp;gt; /etc/wpa_supplicant/wpa_supplicant.conf
#we now create the one we need to be used with wlan1
#cleanup of the file
/bin/echo "" &amp;amp;amp;amp;amp;gt; /home/pi/wpa_supplicant.conf
#Populate the file
/bin/echo "ctrl_interface=DIR=/var/run/wpa_supplicant GROUP=netdev" &amp;amp;amp;amp;amp;gt; /home/pi/wpa_supplicant.conf
/bin/echo "update_config=1" &amp;amp;amp;amp;amp;gt;&amp;amp;amp;amp;amp;gt; /home/pi/wpa_supplicant.conf
/bin/echo "network={" &amp;amp;amp;amp;amp;gt;&amp;amp;amp;amp;amp;gt; /home/pi/wpa_supplicant.conf
/bin/echo 'ssid="'${existingwifissid}'"' &amp;amp;amp;amp;amp;gt;&amp;amp;amp;amp;amp;gt; /home/pi/wpa_supplicant.conf
/bin/echo 'psk="'${existingwifipass}'"' &amp;amp;amp;amp;amp;gt;&amp;amp;amp;amp;amp;gt; /home/pi/wpa_supplicant.conf
/bin/echo "}" &amp;amp;amp;amp;amp;gt;&amp;amp;amp;amp;amp;gt; /home/pi/wpa_supplicant.conf
#initiate wifi connection
/bin/echo "" &amp;amp;amp;amp;amp;gt; /home/pi/start-wifi.sh
/bin/echo "#!/bin/bash" &amp;amp;amp;amp;amp;gt;&amp;amp;amp;amp;amp;gt; /home/pi/start-wifi.sh
/bin/echo "/sbin/wpa_supplicant -B -c/home/pi/wpa_supplicant.conf -i${onboardwan} -Dnl80211,wext" &amp;amp;amp;amp;amp;gt;&amp;amp;amp;amp;amp;gt; /home/pi/start-wifi.sh
/bin/chmod +x /home/pi/start-wifi.sh;
/home/pi/start-wifi.sh &amp;amp;amp;amp;amp;amp;
#Identify an other NIC in the raspberry (USB plugged one, to be used as LAN, aside of wifi)
usbnic=`/root/get-2nd-nic.sh`
#Force dhcp on interface
/sbin/dhclient ${onboardwan}
#update the NIC interface in the pi-hole config
#drop interface (last line)
/bin/cat /etc/dnsmasq.d/01-pihole.conf| grep -v interface &amp;amp;amp;amp;amp;gt; /root/01-pihole.conf.tmp
#update file without interface
/bin/cat /root/01-pihole.conf.tmp &amp;amp;amp;amp;amp;gt; /etc/dnsmasq.d/01-pihole.conf
#Add interface
/bin/echo "interface="${onboardwan} &amp;amp;amp;amp;amp;gt;&amp;amp;amp;amp;amp;gt; /etc/dnsmasq.d/01-pihole.conf
#restart the service
#systemctl restart dnsmasq
#Define wifi SSID
wifissid="raspappriv"
#Define wifi password
wifipass="welcomepriv2"
#Define wifi ip-net /24 by default
wifinetip="192.168.12.1"
# For home we keep subnet isolated (no bridge) to be able to force web filtering via pi-hole and we allow communication between devices (default IP for the AP is 192.168.12.1 and we run a pi-hole on it for DNS fo we force DNS server to be itself) using embedded wifi
/usr/bin/create_ap --daemon --dhcp-dns ${wifinetip} --ieee80211n --ht_capab '[HT20+]' -c 11 -w 2 wlan0 ${onboardwan} ${wifissid} ${wifipass}
#Now we want to protect the connected interface assuming this is WAN, and nothing from there should come in
#create_ap brings its own rules already
#I accept only packets that were initiated by the device
iptables -A INPUT -m state --state RELATED,ESTABLISHED -j ACCEPT
#If you want to allow ping from outside to your device, uncomment below
#iptables -A INPUT -p icmp -j ACCEPT
#We fix slowlyness due to pi-hole as explained here : https://pi-hole.net/2018/02/02/why-some-pages-load-slow-when-using-pi-hole-and-how-to-fix-it/
iptables -A INPUT -p tcp --destination-port 443 -j REJECT --reject-with tcp-reset
iptables -A INPUT -p udp --destination-port 80 -j REJECT --reject-with icmp-port-unreachable
iptables -A INPUT -p udp --destination-port 443 -j REJECT --reject-with icmp-port-unreachable
#If you want to route/NAT a port from outside to an internal machine (which has static IP or reserved IP in /root/udhcpd.conf.master like 192.168.12.200 for the example below) to export a service (if you host nextcloud on a machine in your lan and want to make it available) :
#iptables -t nat -A PREROUTING -j DNAT -i ${onboardwan} -p tcp --dport 9443 --to-destination 192.168.12.200:9443
#now, while your service above is available from outside, like https://your-public-ip:9443, it is sadly not responding from internal wifi, so we allow it as well this way
#iptables -t nat -A PREROUTING -j DNAT -i wlan0 -p tcp --deport 9443 --to-destination 192.168.12.200:9443
#if you want to allow SSH to your device from outside (be careful, you'll get a lot of dictionary attacks and hacking attempts), you may want to uncomment below to open port 22 from outside
#iptables -A INPUT -p tcp -m state --state NEW -m tcp --deport 22 -j ACCEPT
#If we have a second interface (usbnic) then, we assign an IP to it, and we start dhcp server, and add propoer firewall rules
if [ ! -z "${usbnic}" ]; then
#we have an USB NIC, we set it up to handle the LAN connections as well
#defining IP
/sbin/ifconfig ${usbnic} 192.168.13.1 netmask 255.255.255.0 broadcast 192.168.13.255
#starting dhcp server on it
#copy the master config file as base (no interface designed)
/bin/cp /root/udhcpd.conf.master /root/udhcpd.conf
#adding the proper interface
/bin/echo "interface ${usbnic}"&amp;amp;amp;amp;amp;gt;&amp;amp;amp;amp;amp;gt;/root/udhcpd.conf
#sending DNS request to the pi-hole on pi-hole proper IP
iptables -t nat -A PREROUTING -j DNAT -i ${usbnic} -p tcp --dport 53 --to-destination ${wifinetip}:5353
iptables -t nat -A PREROUTING -j DNAT -i ${usbnic} -p udp --dport 53 --to-destination ${wifinetip}:5353
#Assuming you opened the port 9443 above on wan and wifi, you also want, if connected your LAN machines to be able to access the service, so you would uncomment
#iptables -t nat -A PREROUTING -j DNAT -i ${usbnic} -p tcp --dport 9443 --to-destination 192.168.12.200:9443
#allow ip forward from this LAN
iptables -A FORWARD -s 192.168.13.0/24 -i ${usbnic} -j ACCEPT
#We NAT the traffic from this LAN
iptables -t nat -A POSTROUTING -s 192.168.13.0/24 -j MASQUERADE
#starting udhcpd
/usr/sbin/udhcpd -S /root/udhcpd.conf
fi
####################
#Because we use the WIFI as WAN, we can use the onbard NIC ($onboardlan) as second LAN CARD
####################
#configure onboard LAN IP
/sbin/ifconfig ${onboardlan} 192.168.15.1 netmask 255.255.255.0 broadcast 192.168.15.255
#create dedicated dhcp server config file
/bin/echo "" &amp;amp;amp;amp;amp;gt; /root/udhcpd2.conf
/bin/echo "start 192.168.15.10" &amp;amp;amp;amp;amp;gt;&amp;amp;amp;amp;amp;gt; /root/udhcpd2.conf
/bin/echo "end 192.168.15.254" &amp;amp;amp;amp;amp;gt;&amp;amp;amp;amp;amp;gt; /root/udhcpd2.conf
/bin/echo "lease_file /var/lib/misc/udhcpd2.leases" &amp;amp;amp;amp;amp;gt;&amp;amp;amp;amp;amp;gt; /root/udhcpd2.conf
/bin/echo "pidfile /var/run/udhcpd2.pid" &amp;amp;amp;amp;amp;gt;&amp;amp;amp;amp;amp;gt; /root/udhcpd2.conf
/bin/echo "opt dns 192.168.15.1" &amp;amp;amp;amp;amp;gt;&amp;amp;amp;amp;amp;gt; /root/udhcpd2.conf
/bin/echo "option subnet 255.255.255.0" &amp;amp;amp;amp;amp;gt;&amp;amp;amp;amp;amp;gt; /root/udhcpd2.conf
/bin/echo "opt router 192.168.15.1" &amp;amp;amp;amp;amp;gt;&amp;amp;amp;amp;amp;gt; /root/udhcpd2.conf
/bin/echo "option domain local" &amp;amp;amp;amp;amp;gt;&amp;amp;amp;amp;amp;gt; /root/udhcpd2.conf
/bin/echo "option lease 864000" &amp;amp;amp;amp;amp;gt;&amp;amp;amp;amp;amp;gt; /root/udhcpd2.conf
/bin/echo "# Static leases map" &amp;amp;amp;amp;amp;gt;&amp;amp;amp;amp;amp;gt; /root/udhcpd2.conf
/bin/echo "#static_lease 00:60:08:11:CE:4E 192.168.15.54" &amp;amp;amp;amp;amp;gt;&amp;amp;amp;amp;amp;gt; /root/udhcpd2.conf
/bin/echo "#static_lease 00:60:08:11:CE:3E 192.168.15.44" &amp;amp;amp;amp;amp;gt;&amp;amp;amp;amp;amp;gt; /root/udhcpd2.conf
/bin/echo "interface ${onboardlan}" &amp;amp;amp;amp;amp;gt;&amp;amp;amp;amp;amp;gt; /root/udhcpd2.conf
iptables -t nat -A PREROUTING -j DNAT -i ${onboardlan} -p tcp --dport 53 --to-destination ${wifinetip}:5353
iptables -t nat -A PREROUTING -j DNAT -i ${onboardlan} -p udp --dport 53 --to-destination ${wifinetip}:5353
iptables -A FORWARD -s 192.168.15.0/24 -i ${onboardlan} -j ACCEPT
iptables -t nat -A POSTROUTING -s 192.168.15.0/24 -j MASQUERADE
/usr/sbin/udhcpd -S /root/udhcpd2.conf
#If you decided to open the port for your service on 9443 above (NAT), you need to accept it on the router too, so uncomment below
#iptables -A INPUT -p tcp -m tcp --dport 9443 -j ACCEPT
#I refuse any connection otherwise
iptables -A INPUT -i ${onboardwan} -j DROP
#We also load all the iptables helpers modules
/sbin/modprobe ip_nat_ftp nf_conntrack_netbios_ns xt_conntrack xt_multiport ip_nat_sip ip_conntrack_sip nf_conntrack_ftp nf_nat_ftp
exit 0[/bash]
Then, when the raspberry boots, it will connect to the existing wifi with the information you’ve configure in the file, and will broadcast your own SSID.
You’ll also be able to connect a device on the LAN port, AND the USB LAN adapter if you have the one used for the router project. It means, 2 clients in ethernet (or more if using a switch) and wifi.
From there, you may consider the use of a VPN on the raspberry itself, yet to be tested, i’ll add comments later on, planning to test sshuttle, openvpn (compatibles with protonvpn), and potentially expressvpn. All are working, just to be tested against existing iptables rules basically.
As usual, this is a post to keep a track, and it should work for you as well.
![]()
Links

Calendrier
| L | M | M | J | V | S | D |
|---|---|---|---|---|---|---|
| 1 | 2 | 3 | 4 | 5 | ||
| 6 | 7 | 8 | 9 | 10 | 11 | 12 |
| 13 | 14 | 15 | 16 | 17 | 18 | 19 |
| 20 | 21 | 22 | 23 | 24 | 25 | 26 |
| 27 | 28 | 29 | 30 | 31 | ||
Recherche
Derniers articles
Tresronours Twitter

Keywords cloud topic
Membre de la FSF
Liens qui vont bien
Mots clés vrac – keyword cloud
License du contenu – CC By NC SA

This création is licensed under a Creative Commons Paternité - Pas d'Utilisation Commerciale - Partage des Conditions Initiales à l'Identique 2.0 France License.
Archives
- Getting voLTE on your Android with Fizz and others
- Defining the scope of an ISMS within ISO 27001
- Resumed posting and expanding on X
- Linkedin Access to your account has been restricted – Final debrief and resilience plan
- I’m thankful for the support I get in rough time
- Cyber security news of the day – 2024 May 31
- Alexandre Blanc Cyber Kicked out from Linkedin
- You’ll most likely find me on LinkedIn
- The Russian roulette landing page !
- RTSP, Debian, VLC, not playing, IP Camera
- 5G network hosted in the cloud, no internet, no phone ! So smart ! And I ended on TV, This week in cyber
- They lock the door for privacy… but they keep a copy of the key, and couple of backdoors
- Worst is yet to come, but they all warned you
- Migrating an old WordPress and handling character set, UTF8, latin1, latin1_swedish_ci
- From a broken TLS CA, to Facebook, to FIN12 hit and run
- Yes we can fix this mess, but do we want to ? That’s another story
- Criminals are still dominating the game, why are we doing so wrong, and what can we learn in this tech ocean ?
- Riding cloud can be tricky, don’t fall from it, in the weekly cyber !
- The threat landscape is very dynamic – Cyber news this week
- Cybersecurity is not obvious even for this newsletter !
- Install Slack desktop app on Kali rolling fixing libappindicator3-1 missing dependency
- How to delete all resources in azure to avoid charges after trial on your forced credit card registration
- Proxmox – ZFS – Dead drive on active VM, recover from replicated disk
- Restrict access to proxmox web admin interface
- Migrate your ESXI VMs to proxmox ZFS
- Install your VPN server with pi-hole on OVH VPS in 30 min
- Using raspberry pi 3 as wifi bridge and repeater and firewall
- Raspberry 3 – create a wifi repeater with USB wifi dongle
- raspberry 3 – routeur pare feu point d’acces wifi avec filtrage pub et tracking – router firewall access point with ads and tracking filtering
- Dell XPS 13 touchpad – corriger la sensibilité
- Utiliser Zazeen set top box depuis une connexion videotron
- Fermeture de mon compte facebook – la dernière goutte
- Choisir un kernel par defaut au demarrage de Centos 7.2 – configuration grub2
- Openvpn access server 2.0.25 et android
- Régler la luminosité du laptop par ligne de commande
- chromium outlook web app version complete sous linux
- Nexus 7 2012 – android 5 lollipop solution au probleme de lenteur
- HDD led sur Xubuntu – xfce
- xubuntu 14.04 verrouiller ecran de veille et desactiver mise en veille a la fermeture de l’ecran
- Authentification avec Radmin en utilisant Wine sur Gentoo
- Patcher bash sur une distribution plus supportee comme fedora 11
- Zimbra desktop sous xubuntu 14.04 64bit – fix
- xubuntu 12.10 probleme de son avec VLC – pulse audio – alsa – toshiba L855D – solution
- Evolution sous xubuntu 12.10 – bug affichage a la configuration – solution temporaire
- Booster son acces internet en changeant de DNS pour opendns
- Serveur DLNA sous ubuntu – minidlna
- sshfs sous windows – dokan sshfs
- xubuntu 11.10 Installer le plugin java pour firefox
- Installer Google Earth sur Xubuntu 11.10
- Installer nagios sur Fedora 11 depuis les sources